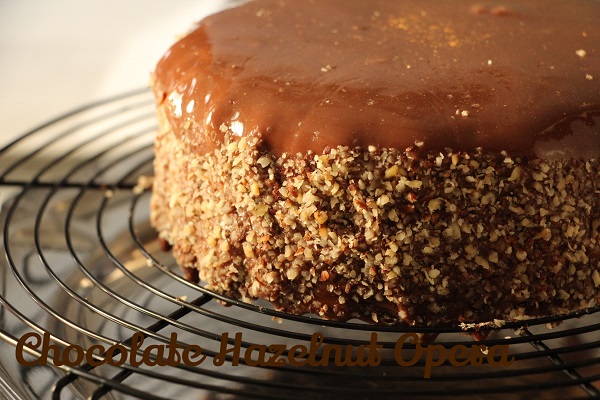
Sunday, 27th December – tomorrow is my mum’s birthday and as I do not get to see her often (and the rest of my family as well) I was really looking forward to bake something nice for them. What does my mum like? Chocolate obviously! So the recipe that came right away to my mind was the one of a chocolate / hazelnut opera inspired by Fashion Cooking. This recipe requires time and patience and needs to be prepared the day before.
INGREDIENTS ( for 4/5 gourmands)
Biscuit
- 65g hazelnut powder
- 150g almond powder
- 214g egg whites (5,5 big egg whites)
- 200g sugar
Crispy Praline
- 175g hazelnut spread
- 3 big handfuls of cornflakes
Chocolate Icing
- 8g gelatine (4 leaves)
- 120g water
- 145g sugar
- 50g unsweetened cocoa powder
- 100g liquid full cream
- 200g crushed hazelnuts
Chocolate Mousse
- 250g baking dark chocolate
- 100g liquid full cream
- 2 yolks
- 6 egg whites
- 1 pinch of salt
- 40g sugar
PREPARATION
Biscuit
Material: oven, mixer + big bowl OR bowl + hand mixer, silicon spatula, two oven trays, baking paper, compass, icing bag with rond nozzle, oven glove
- Preheat your oven at 180°C. Place the egg whites with about 50g sugar in your mixer or a bowl and whisk it. Add the rest of the sugar at the end and keep whisking until the preparation gets shinny and smooth. If you used your mixer, transfer the preparation in a bowl and slowly add and stir in the hazelnut and almond powders with a silicon spatula.
- Prepare two sheets of baking paper and draw two circles. The diametre of these must be 3 cm bigger than the baking pan you are using. Put the biscuit preparation in an icing bag with a rond nozzle and form two disks inside the circles you drew. Start from the center and turn around following the previous small circle you made and so on until the edges of the circle. It is important to have no gaps betweens the circles. If this does not look good from the first trial, do not worry, as the biscuits will be hidden under the chocolate mousse and praline. Fix the gaps.
- Put the two oven trays in the oven for 8 to 10 minutes then switch the trays to make sure you have an homogeneous cooking process and bake for another 8 to 10 minutes. Once baked, the biscuits should be coloured. Take them out of the oven and wait 5 minutes or so before putting them upside down on a flat surface, and remove slowly and delicately the baking paper.
Crispy Praline
Material: a big pan and a small pan with a spoon, freezer bag, baking pan, sharp knife
- Crumble the cornflakes by puting them in a closed freezer bag and by squeezing it in your hands. Prepare a water-bath (i.e. fill a big pan with 2/3 of water and place a small pan inside) and melt the hazelnut spread. Once it is smooth and easy to mix, add the crumbled cornflakes and mix. Remove the pans from the heat.
- Cut the biscuit in disks of the size of the baking pan. You can place the pan on the biscuit to help the cutting process but be careful not to press too much on the pan. Then spread a layer of crispy praline on each disk.
Chocolate Icing
Material: bowl, salad bowl with a wooden spoon, sauce pan with a wooden spatula
- Put the leaves of gelatine in a cold water bowl. In the salad bowl, mix the cocoa powder and the sugar. In a sauce pan (not on the heat), mix water and cream then add the preparation cocoa powder / sugar. Stir gently with a wooden spatula and cook over low heat until it simmers. Remove the pan from the heat and add the gelatine. Let it melt and stir very gently but not too much to avoid forming bubbles. Once the gelatine is well melted put the icing in a sealed tin and save it in the fridge until the next day.
Chocolate Mousse
Material: two sauce pans with a silicon spatula, mixer OR bowl + hand mixer, salad bowl
- Prepare a water-bath and melt the dark chocolate. You do not need to add water. Let melt. At the same time, bring the cream to a boil in a sauce pan. Once the chocolate has melted, remove the pan from the heat and add 1/3 of the hot cream at the center of the melted chocolate, and stir energetically until the cream is well embeded. Repeat the process with another third of the cream, and the last third, as well as with each yolk.
- Whisk the egg whites and sugar, and a pinch of salt, until slightly firm with a mixer or in a bowl with a hand mixer.
- Transfer the chocolate preparation in a salad bowl and stir in gradually the whisked egg whites.
Assembling
If you have a bottomless baking pan: put a sheet of baking paper on a flat plate and cover the edges of the baking pan. Pour 2/3 of the chocolate mousse and cover it with a disk of biscuit (no matter if the crispy praline is up or down). Add the rest of the chocolate mousse and finish with the second disk of biscuit (praline facing down). Put the cake in the freezer for one night.
If you have a normal baking pan: cover the bottom and edges of the pan with baking paper and follow the same process as described above. Note that the unmolding process with this type of pan is more complicated (but not impossible).
The Next Day…
Material: cake cardboard disk, round baking rack, metallic spatula, microwave OR sauce pan, thermometer, two pie pans larger than the cake
- If you did not find ready crushed hazelnut at the supermarket, then start crushing your hazelnuts before taking care of the cake. The chocolate icing has gelatine in it, and if you wait too long after liquidifying it, it will solidify quite quickly and you will not have time to stick the crushed hazelnuts on the edges.
- Take the cake out of the freezer. Ideally, you have a cake cardboard disk the size of the cake. Place it on the top of the cake (biscuit side) and turn it upside down on the round baking rack. If you used the bottomless baking pan, remove the baking paper and start pushing gently on the biscuit to unmold the cake. If you used the normal baking pan, use a hairdryer on low heat and low power and turn around the pan. Check regularly if the cake is coming down. Be patient, it can take up to 10 minutes until the cake unmolds. Go step by step as the chocolate mousse melts quickly. Once the cake is out of the baking pan, adjust the top with a metallic spatula to make sure the icing will be as regular as possible. Put the cake back in the freezer.
- Melt the chocolate icing in the microwave, 350W, for 2 minutes or until it becomes liquid. Stop the heating process as soon as it starts boiling, otherwise you will have a lot of bubbles. If you do not have a microwave, use a sauce pan on low heat. Let it cool at 30°C. To speed up the process, place the container of your icing in a cold bath. If you do not have a thermometer, note that it will take around 10 minutes to cool. Check with one finger the temperature. It should not be hot otherwise the cake would melt.
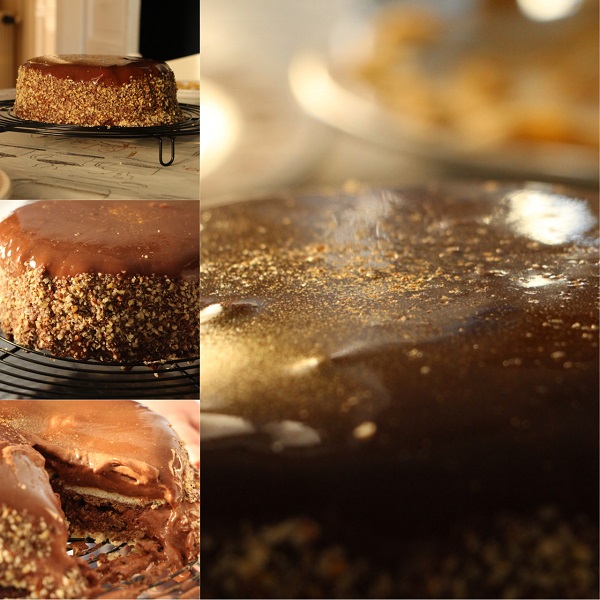
- Take the cake and its round baking rack out of the freezer and put a pie pan underneath. Pour slowly the chocolate icing in the center of the cake and let it cover the edges. The first round can be disappointing. But do not worry! Move the baking rack and cake on top of the second pie pan, and pour the excess of icing, which felt into the first pie pan, again in the middle of the cake. Repeat this process as many times as needed to cover the edges and obtain a plain icing. You will notice that the icing get thicker. Once satisfied with the result, let dribble the excess of icing for 2 minutes and start covering the edges with crushed hazelnuts. Do not hesitate to be generous.
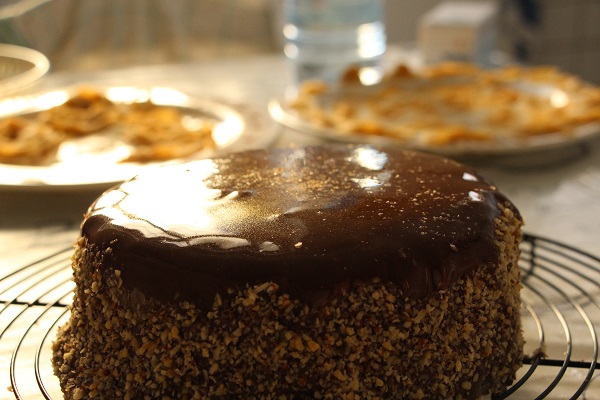
- A last touch with gold powder. Et voilà.
- Put the cake on a flat plate with the cake cardboard disk and reserve it in the fridge for 2 hours before la dégustation. You would not like your guests to crunch icy bits.
Comments